
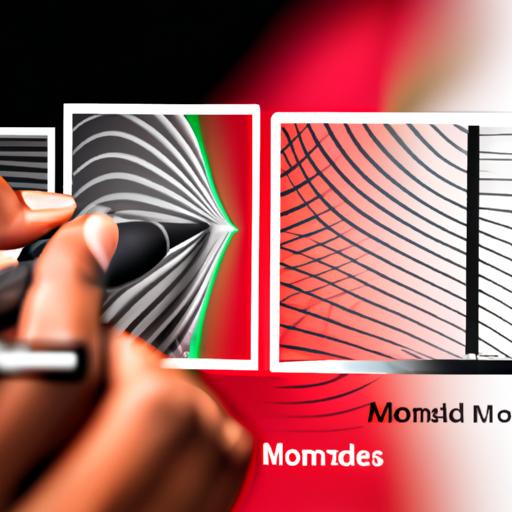
Are you looking to take your Photoshop skills to the next level? Blending images seamlessly in Photoshop is a powerful technique that can unlock a world of creative possibilities. Whether you’re a graphic designer, photographer, or simply an enthusiast, mastering the art of blending can elevate your work to new heights. In this comprehensive guide, we will delve into the intricacies of blending in Photoshop, exploring various techniques and providing step-by-step instructions. Get ready to unleash your creativity and learn how to blend like a pro!
Understanding Blending Modes
Blending modes are at the heart of seamless image integration in Photoshop. These modes determine how layers interact with each other, allowing you to achieve different effects and combine images in unique ways. With over 27 blending modes at your disposal, understanding their functionalities is crucial. Let’s explore some of the most commonly used blending modes:
1. Normal Blending Mode
The Normal blending mode is the default option and simply displays the active layer without any blending. It is useful when you want to work on a layer independently.
2. Multiply Blending Mode
The Multiply blending mode darkens the underlying colors, making it ideal for creating shadows or adding depth to an image. It multiplies the base color by the blend color, resulting in a darker composite.
3. Screen Blending Mode
The Screen blending mode lightens the underlying colors, making it perfect for creating highlights or enhancing brightness. It multiplies the inverse of the base color by the inverse of the blend color, resulting in a lighter composite.
4. Overlay Blending Mode
The Overlay blending mode combines the Multiply and Screen modes, allowing you to both darken and lighten specific areas of the image. It enhances contrast and can produce dramatic effects.
5. Soft Light Blending Mode
The Soft Light blending mode adds a subtle, diffused light effect to the underlying image. It is often used for creating a soft glow or giving images a dreamy atmosphere.
6. Difference Blending Mode
The Difference blending mode compares the base and blend colors, producing an inverted result. It is useful for detecting differences between two images or creating abstract effects.
Step-by-Step Guide: Blending Images in Photoshop
Now that we have a basic understanding of blending modes, let’s dive into the step-by-step process of blending images seamlessly in Photoshop. By following these instructions, you’ll be able to create stunning composite images that appear as if they were captured in a single shot.
1. Selecting Appropriate Images
Before you start blending, it’s crucial to choose images that complement each other. Consider factors like lighting, perspective, and color scheme to ensure a harmonious blend. Experiment with different combinations to find the perfect match.
2. Creating a New Document
Open Photoshop and create a new document with the desired dimensions. This will serve as the canvas for your blended image. Import the images you want to blend as separate layers into the document.
3. Arranging the Layers
Arrange the layers in the order you want them to appear in the final blend. Use the Transform tool to resize, rotate, or position the layers as needed. Pay attention to perspective and ensure a seamless integration.
4. Utilizing Layer Masks
Layer masks are essential for blending images smoothly. Select the top layer and add a layer mask. Use a soft brush with varying opacity to reveal or hide specific areas, blending the layers seamlessly. Take your time and refine the mask until you achieve the desired result.
5. Experimenting with Blending Modes
Now comes the fun part – experimenting with blending modes. Select the top layer and try different blending modes to see how they interact with the layers beneath. Take note of the unique effects each blending mode produces and choose the one that best suits your vision.
6. Fine-Tuning and Refining
To achieve a polished blend, fine-tune the image by adjusting the opacity of the layers, applying adjustments or filters, or using additional adjustment layers. This step allows you to enhance the overall composition and ensure a seamless integration.

Advanced Blending Techniques
Once you’ve mastered the basics of blending, it’s time to explore advanced techniques to take your skills to the next level. Here are some advanced blending techniques to experiment with:
Blending Multiple Layers
Consider blending multiple layers to create intricate compositions. This technique allows you to combine different elements from various images, resulting in visually compelling blends. Use layer masks and blending modes strategically to achieve a cohesive and harmonious result.
Adjusting Opacity
Experiment with adjusting the opacity of individual layers to control their visibility and create subtle blends. Lowering the opacity can help merge images seamlessly and achieve a more gradual transition between elements.
Utilizing Adjustment Layers and Filters
Take advantage of adjustment layers and filters to enhance your blends. Adjustment layers allow you to make non-destructive changes to the image, while filters can add unique effects or modify specific areas. Play around with different settings to achieve the desired look.
Tips and Tricks for Professional-Looking Blends
- Pay attention to lighting and shadows to ensure a realistic blend.
- Match the colors and tones of the images for a cohesive composition.
- Use layer masks creatively to incorporate only specific parts of an image.
- Experiment with different brushes and brush settings to achieve desired blending effects.
- Take inspiration from other artists and photographers to learn new techniques and styles.
Frequently Asked Questions (FAQ)
Q: Can I blend images in Photoshop Elements?
A: Yes, although Photoshop Elements has a limited number of blending modes compared to the full version of Photoshop, you can still achieve impressive blends using the available options. Follow the same principles and techniques discussed in this guide.
Q: How can I blend images with different resolutions?
A: Blending images with different resolutions can be challenging but not impossible. Start by resizing the higher-resolution image to match the lower-resolution image. Then, follow the blending techniques mentioned earlier, paying attention to perspective and proportions.
Q: Are there any shortcuts to blending images in Photoshop?
A: While there are no shortcuts to mastering blending in Photoshop, practice and experimentation are key. The more you familiarize yourself with the tools and techniques, the easier and faster the process will become. Don’t be afraid to explore and push the boundaries of your creativity.
Conclusion
Blending images in Photoshop opens up a world of creative possibilities, allowing you to seamlessly integrate multiple elements and create stunning compositions. By understanding blending modes, following a step-by-step process, and experimenting with advanced techniques, you can master the art of blending and take your Photoshop skills to new heights. Remember, practice makes perfect, so don’t be afraid to dive in, experiment, and let your imagination run wild. Happy blending!